Understand Redux with React in few steps

In this tutorial you will understand everything you need to know about redux as a beginner. We will go from the concepts to hands-on practice. By the end of this tutorial, we will build a counter program to understand how to use redux.
Prerequisites : React, Javascript ES6
Concepts
1- Understand State management
State management is a way to present the data you use in your application in a form of data structure. Therefore, it will be easier to exchange this data between components. It facilitates the communication between the different components and lets them know about any updated data in an easy way.
In React, there are many different libraries for state management : Redux, Recoil, context api etc.
2- Communication between components in React without Redux
Before we learn how redux works, it is important to know how React works without using Redux.
In fact, the communication between components goes from top to bottom using props. This means, whenever you want to pass data, it should go from a parent node to a child node.

In the picture above, if child 1.1.1 needs a data that was declared in the parent node, then this is what will happen :
the parent node passes the data as props to child 1, then child 1 receives the data and passes it as props to child 1.1, then child 1.1 receives the data and passes it as props to child 1.1.1
We call this cycle Prop-Drilling which means in order to pass data from one component to another, it should go through all the components of the tree between the two components communicating from top to bottom, even though they didn’t ask for it.
Imagine if this app gets bigger, we can have hundreads of components, it will be very difficult to use this approach. Just thinking about it is tiring and overwhelming !
Another disadvantage of this approach is the case where we want to communicate data between the child 1.1.1 and child 2.1 which can be quite challenging.
3- Redux
As a solution to the previous problems, Redux was introduced as state management library.
Redux makes everything easier !
How Redux works ?

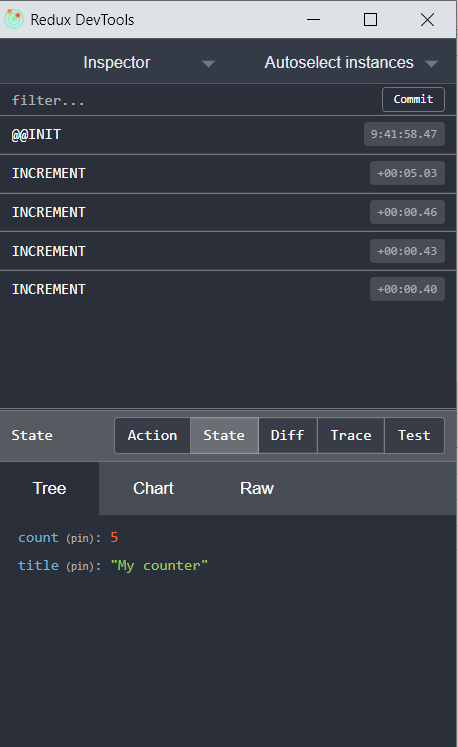
Redux defines a Store where all the data ( states ) is saved. Whenever you update a state, it will be automatically updated in the store and communicated from it to all the components of your app.
Therefore, whenever a component needs data, it requires it from the store directly.
Let’s practice !
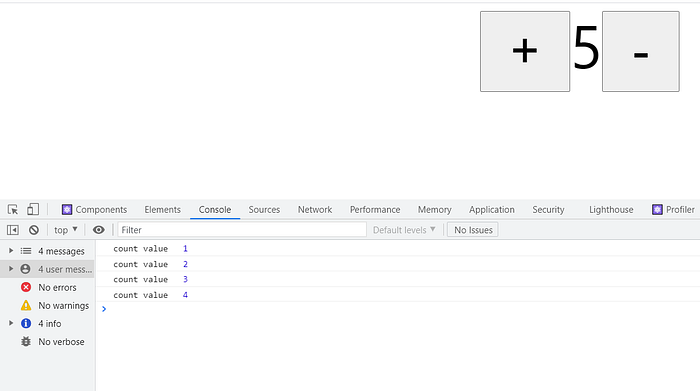
In this part we will build a counter program with redux. The app is very simple but teaches a lot.
This app allows you to increment or decrement the value of a state ( counter )
1- Installation
After creating your react app do the following steps to install redux.
with npm :

with yarn :

Notice that we need to install both redux and react-redux.
Redux allows us to create the store and react-redux allows us to use redux in a React app.
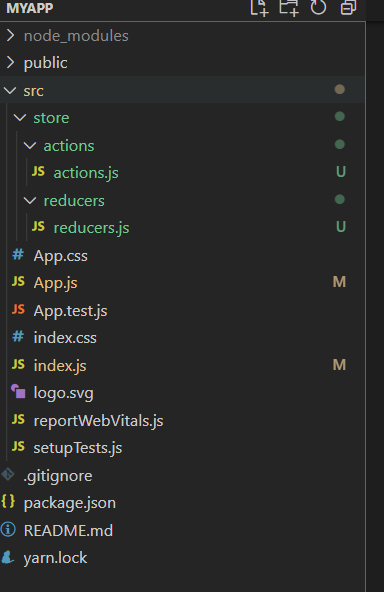
Ater installation create a folder named Store. Under this folder create two more folders one named actions and the other reducers.
You can name the folders the you want but this is best practice
2- Coding
In order to work with redux, there are few steps to go through which are applicable no matter what application you are building. You can start with any step you want but I like to go through it as follows :
1- Defining the actions
2- Defining the reducers
3- Defining the store
4- Dispatching the actions
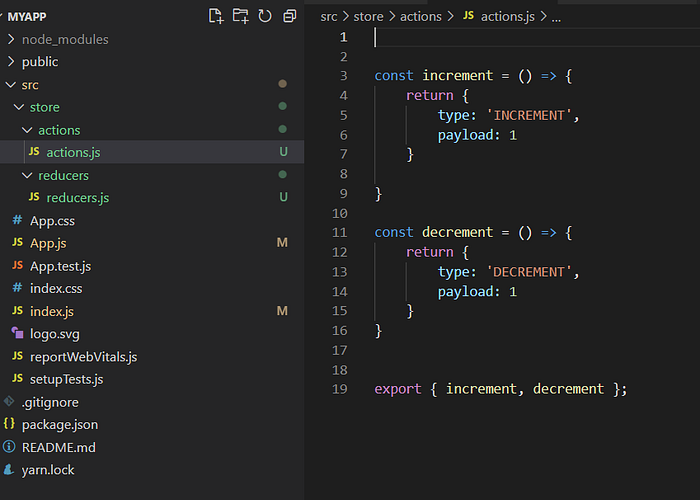
- Defining the actions
Action is simply a function which returns an object with two attributes :
-type : a string that tells what action you are doing
-payload : the data you will use to update your state
In our case we need two actions, one that increments the state and the second decrements it.
type therefore can be : ‘INCREMENT’ and ‘DECREMENT’ ( for example ). It is only a string, feel free to name it as you want. It is best practice to write it in uppercase.
- Defining the reducer
The reducer is the function that does the work of incrementation or decrementation. It takes two parameters. The first parameter is the state that will be updated and the second is the action that will be executed on the state to change it.
It is important to know that whatever you pass as the first parameter in the reducer will be recognized by redux as the state and will be saved in the store automatically.
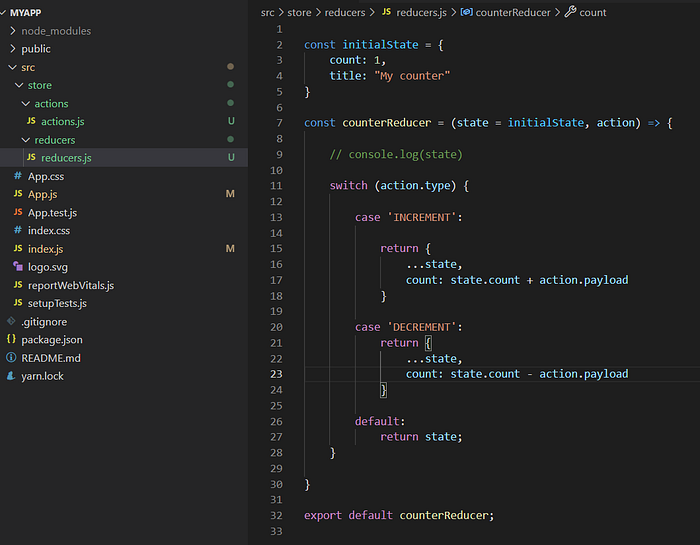
We defined an object initialState and pass it to the state parameter as its initilization.
Based on the action type ‘INCREMENT’ or ‘DECREMENT’ the reducer will return the state with the same fields untouched except for the count field that will be added the value of the payload.
- Defining the store
Now that we have our actions and reducer prepared, we need to create the store. In your index.js file do the following :

In order to create the store, we use the function createStore that we import from redux. This function takes the reducer we previously defined as a parameter, so it knows what state to store as we passed the state to the reducer.
For better visualization of the state being updated we use Redux dev tools extention. Just add it to your browser and then add the following to your createStore method beside to the reducer
window.__REDUX_DEVTOOLS_EXTENSION__ &&window.__REDUX_DEVTOOLS_EXTENSION__()
In order for the store to be accessible by all components we use a Provider that we import from react-redux. This provider takes the store as a prop and passes to our app. This will allow all the components to access the store and the data in it.
<Provider store={store}>
<App />
</Provider>
- Defining the dispatcher
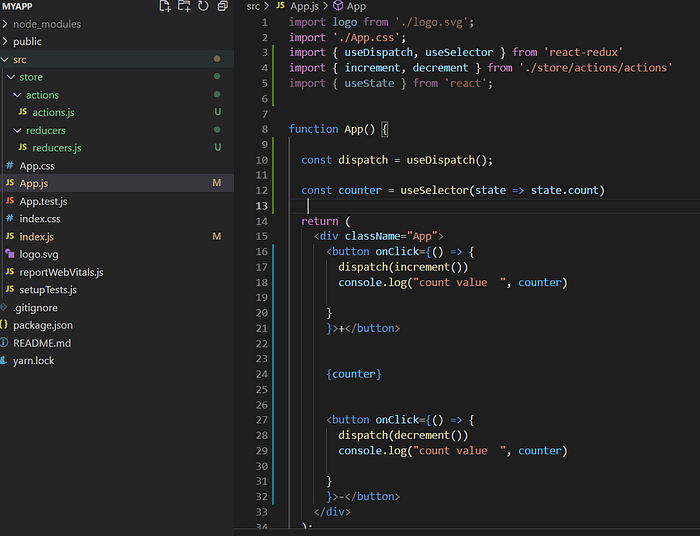
useDispatch is a hook used to define the dispatcher. The dispatcher is a function that takes as a paramer an action and triggers the reducer to execute that action.
When we click on the button +, the dispatcher passes the increment action to the reducer and this one will execute it on the state.
When we click on the button-, the dispatcher passes the decrement action to the reducer and this one will execute it on the state.
but how we can access the state from this file ?
well thanks to the store we use useSelector hook that takes by default as an argument the state that we saved in the store.
We use it then to access to our state from any component.
the counter will be updated accordingly
If you find it overwhelming don’t worry ! Redux is a bit difficult to understant in the beginning but repeat this tutorial by youself and you will be fine !
If you have any question don’t hesitate to ask me in the comments !
full code :

